Genshin Impact Operation Downpour Simulation Event Complete Guide
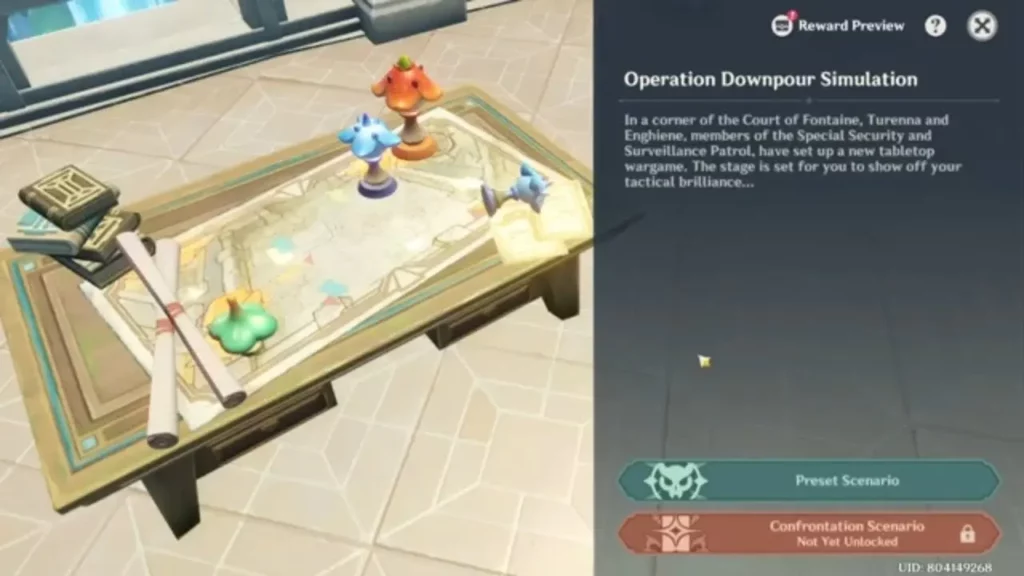
A fresh tabletop strategy game has made its appearance in a section of the Court of Fontaine within Genshin Impact, established by members of the Special Security and Surveillance Patrol. Throughout this event, players have the opportunity to choose their game pieces and position them within designated deployment areas.
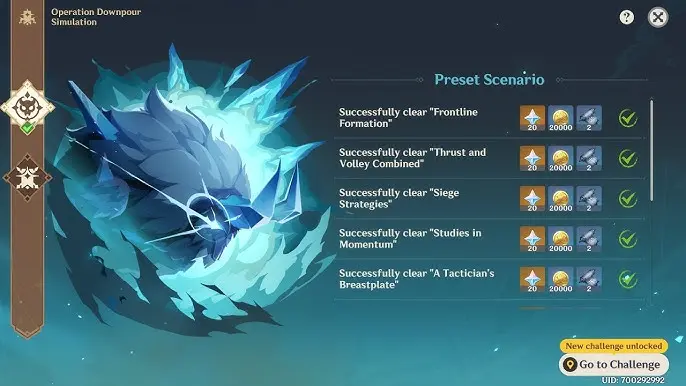
When each challenge begins, pieces will automatically target enemies according to their individual characteristics. Victory is achieved once all defending units and structures on the enemy side have been eliminated. The Operation Downpour Simulation event features a total of 11 stages, and this comprehensive guide provides strategies to successfully complete each one.
Stage 1 – Frontline Formation
Being the opening stage of the Operation Downpour Simulation event in Genshin Impact, this challenge presents a relatively straightforward approach. An effective strategy involves the following steps:
Position two Hilichurl pieces along the upper section of the deployment zone. Deploy two Samachurl pieces beneath the right Cryo Whopperflower. After the two Samachurls eliminate the initial Whopperflower, the Hilichurls will advance to the gap and assault the Wooden Palisades.
Stage 2 – Thrust and Volley Combined
The second stage presents a scenario where all routes leading to the Wooden Palisades are obstructed by barriers. Given that these obstacles consist of wood, pieces capable of delivering Pyro damage to burn through them prove most effective.
Deploy two Ruin Guard pieces in the central area. Position three Hilichurl Grenadier pieces in a linear formation between the two Ruin Guards. The opposing Hydro Slimes will concentrate their attacks on the Ruin Guards, creating a safe environment for the Hilichurl Grenadiers to incinerate all obstacles.
Stage 3 – Siege Strategies
The third stage of Operation Downpour Simulation in Genshin Impact introduces three piece types rather than two, broadening the available tactical approaches.
Position three Cryo Specter pieces directly in front of the Cryo Samachurl at the bottom section. Following the defeat of the Frostarm Lawachurl, place the Ruin Guard in the middle position. Subsequently, position the Electro Samachurl adjacent to the Ruin Guard. The enemy Frostarm Lawachurl can exclusively target ground-based game pieces, effectively rendering the Cryo Specters undetectable. However, this advantage is temporary, as Treasure Hoarder Pyro Potioneers form the next defensive line. The Ruin Guard and Electro Samachurl will provide crucial support by outnumbering the enemy forces.
Stage 4 – Studies in Momentum
The adversaries in this stage harbour a strong dislike for Flying Target pieces, prompting them to deploy a Suppression Specialist Mek—Ousia in the field’s centre. This unit possesses extensive range and prioritises airborne game pieces.
Deploy an Electro Cicin piece at the centre of the deployment zone’s bottom section. Once the first Cryo Whopperflower falls, position one Eroding Avatar of Lava in the previous location and allow it to eliminate the obstacles. After the initial obstacle line is cleared, deploy two Hilichurl pieces behind the Avatar of Lava. Finally, following the removal of the second obstacle line, place the remaining pieces on the field to accelerate enemy defeat in Genshin Impact.
Stage 5 – A Tactician’s Breastplate
Begin by positioning two Hilichurl pieces on the bottom section, with each piece targeting a different Suppression Specialist Mek. Following this, deploy two Cryo Specters on the upper section, ensuring each piece focuses on different Hydro Slimes. The Shackling Mine will temporarily restrain some Hilichurls for several seconds, yet the remaining units can still defeat their respective Suppression Specialist Mek.
Stage 6 – to the Trenches
This stage introduces a new piece: the Hydro Mimic Finch. Similar to its behaviour in Genshin Impact’s open world, the Hydro Mimic releases a shockwave delivering AoE Hydro damage upon defeat.
Place one Grenadier piece in both the bottom right corner and top left corner. Following the destruction of the first barrier, position the Hydro Mimic Finch in the bottom right corner. After the second barrier falls, deploy all remaining pieces in the identical location.
Stage 7 – Grand Armies
This stage features enemies protected by barricades, with some guarding the Wooden Palisades. Utilise long-range pieces to target those behind barricades, whilst employing short-range pieces to focus on the enemy stronghold.
Deploy two Ruin Guard pieces centrally, each targeting enemies not shielded by barricades. Immediately afterwards, position two Electro Samachurls below the barricade, one on the left and one on the right. The Hilichurl piece should also be placed on the bottom right side without delay.
Stage 8 – More Firepower, Fewer Casualties
Barriers protect this entire stage, though Hilichurl Grenadier pieces are available to assist with burning all obstacles.
Initially, defeat the two Frostarm Lawachurl in the centre by deploying one Electro Samachurl piece on each side. Position the Ruin Guard in the bottom lane, ensuring the Treasure Hoarder Pyro Potioneers concentrate their attacks on this piece. Subsequently, place two Hilichurl Grenadiers in the bottom lane to burn down the obstacles.
Stage 9 – Like Mountain Raindrops
Beginning with this stage, difficulty increases significantly, with enemies employing stronger tactics and superior pieces. Whilst numerous enemies cannot attack flying targets, Suppression Specialist Mek units positioned centrally possess large AoE capabilities and can instantly eliminate flying targets.
Position the Eroding Avatar of Lava piece on the middle left side, targeting the main Wooden Palisades. Deploy a Cryo Specter piece on the top left side to attack the Frostarm Lawachurl, then place another Cryo Specter on the bottom side. Once obstacles on the left side are destroyed, position two Hilichurl pieces targeting the Cryo Whopperflower. After Hilichurls defeat the Suppression Specialist Mek, deploy remaining pieces to eliminate all enemies and the Wooden Palisades.
Stage 10 – Like Peeling an Onion
Position one Hydro Mimic Finch on the left side, targeting the Treasure Hoarder Pyro Potioneers, then place another Hydro Mimic Finch on the opposite side. Next, deploy an Electro Cicin on the bottom left side, targeting the Wooden Palisades, and place another Electro Cicin piece on the opposite side.
Deploy a Hydro Mimic Finch on the left side, aiming at the Wooden Palisades. Following its destruction, it will target the Cryo Whopperflowers in the centre. Position the Ruin Guard piece in the middle lane only after the Hydro Mimic Finch has reached the Whopperflowers, ensuring all enemies are hit by the explosion’s shockwave. After all enemies fall, distribute remaining long-range pieces to target the Wooden Palisades.
Stage 11 – Dispersing the Morning Mist
This represents the final and most challenging stage of the Operation Downpour Simulation event in Genshin Impact. With formidable defences and excellent enemy positioning, ensuring all pieces fulfil their roles perfectly becomes crucial.
Deploy one Eroding Avatar of Lava piece at the top and another on the left. Immediately following, position a Hilichurl Grenadier on the top left, targeting the barricade above the Frostarm Lawachurl. After destroying the obstacle on the top left, place a Hydro Mimic Finch targeting the Frostarm Lawachurl, which will then attack the Suppression Specialist Mek on the left side.
Deploy one Cryo Specter on the bottom left, attacking the Lawachurl then the Hydro Slime. Once the Eroding Avatar of Lava falls, position another Cryo Specter piece on the bottom right to eliminate the Treasure Hoarder Pyro Potioneer and another Hydro Slime. Should any enemies remain undefeated, utilise the remaining pieces against them.